Common Windows Errors / Solutions Error: DUN (Dial-up Networking) not installed
Note: If you are on a Network or company LAN, contact your system administrator before making any network changes. To resolve this issue, you will first need to install Dial-Up Networking. Without Dial-Up Networking, you will not be able to connect to the Internet. Before starting, ensure that you have your Windows CD then follow the steps below. Install DUN (Dial-up Networking) - Click on the Windows Start button, point to Settings and select Control Panel.
- Double-click the Add/Remove Programs icon.
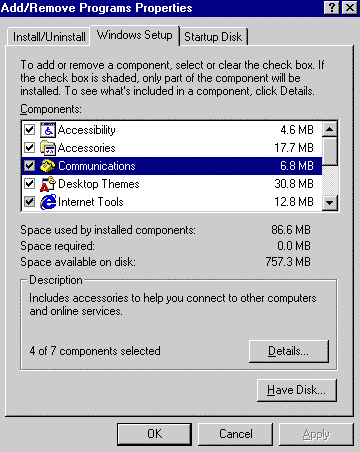 - Select the Windows Setup tab and double-click the Communications option.
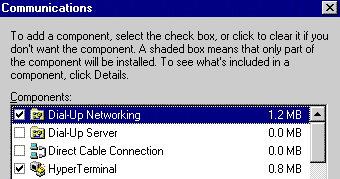 - Check the box next to Dial-Up Networking and insert your Windows CD.
As soon as you have finished installing Dial-Up Networking, reboot your computer. Configuring the Windows Network Components for Dial-Up-Networking The following instructions are for those systems that are not on a Local Area Network (LAN). If you are on a LAN and follow these directions, you may create a conflict that will disrupt your computer's connection to your LAN. Please contact your network administrator for assistance before you continue making any changes to the system configuration. - Click on the Windows Start button, point to Settings and select Control Panel.
 - Double-click the Network icon.
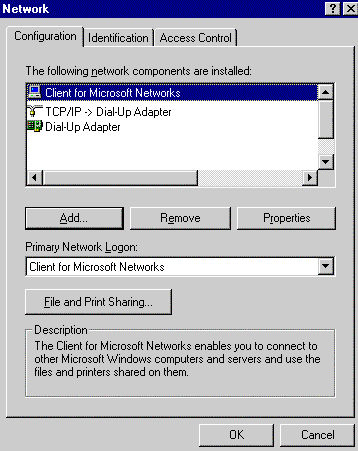 - What you will find listed under the Configuration tab will depend on your version of Windows. BlueLight Internet requires three network components total, but you may have more or less listed. The three that are required are:
- Client for Microsoft Networks
- Dial-Up Adapter
- TCP/IP
Note: You may see TCP/IP->Dial-up Adapter grouped together.
If Client for Microsoft Networks is not listed, you will need to add it: - Click on the Add button.
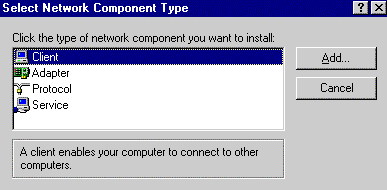 - Select Client.
- Click on the Add button.
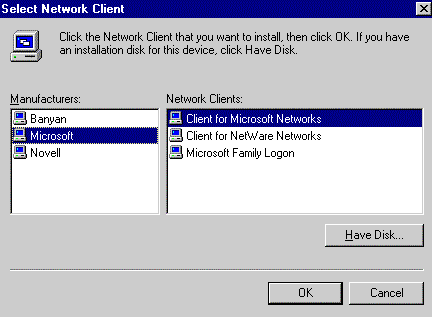 - Under Manufacturers, select Microsoft.
- Under Network Clients, select Client for Microsoft Networks.
- Click OK.
Note: This may automatically add all three components.
If Dial-Up Adapter is not listed, you will need to add it: - Click on the Add button.
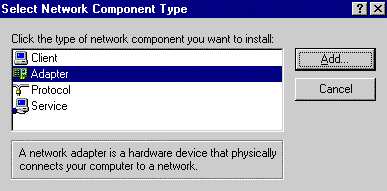 - Select Adapter.
- Click on the Add button.
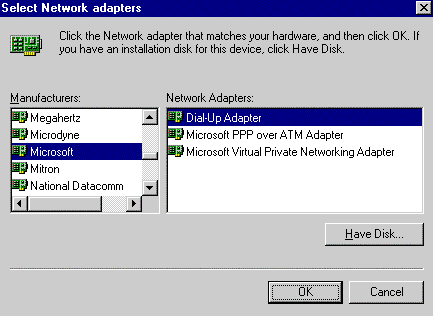 - Under Manufacturers, select Microsoft.
- Under Network Adapters, select Dial-Up Adapter.
- Click OK.
If TCP/IP is not listed, you will need to add it: - Click on the Add button.
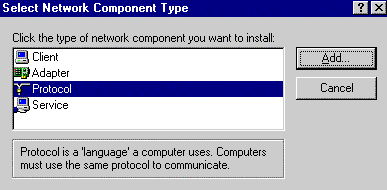 - Select Protocol.
- Click on the Add button.
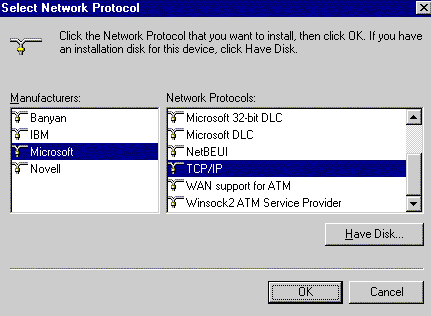 - Under Manufacturers, select Microsoft.
- Under Network Protocols, select TCP/IP.
- Click OK.
Once you have confirmed that the three required Network components are installed, check your network settings to ensure that TCP/IP is correctly configured. Check Network Settings  Note: In the Primary Network Logon drop-down menu, ensure that Client for Microsoft Networks is selected.
- Double-click TCP/IP->Dial-Up Adapter.
Note: If you get a TCP/IP Properties Information window, click OK. 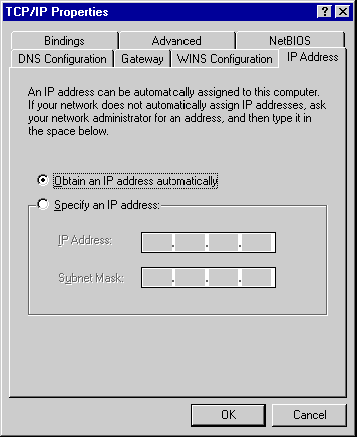 - Ensure that only the circle next to Obtain an IP address automatically is checked.
- Select the WINS Configuration tab.
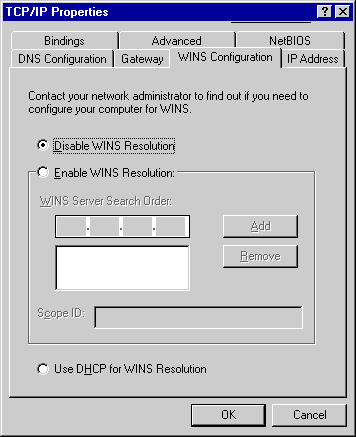 - Ensure that only the circle next to Disable WINS Resolution is checked.
- Click OK. You will be prompted to re-boot your computer.
- Click OK.
Retry the BlueLight Internet connection.
| 