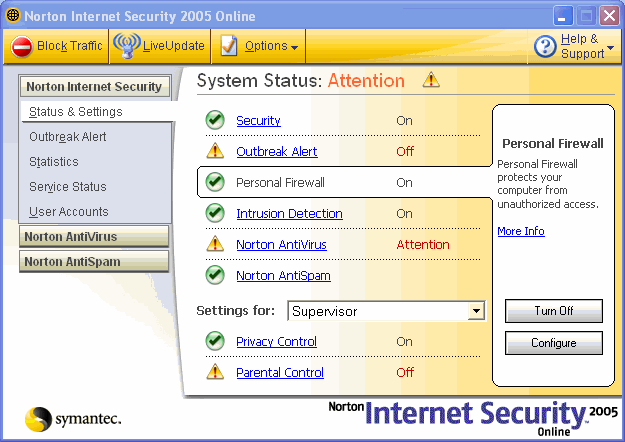
How to Enable or Disable Personal Firewall in Norton Internet Security Online? The Norton Personal Firewall can be enabled or disabled only through an account that has Supervisor privileges. To Enable or disable Norton Personal Firewall - Click Norton Internet Security icon on the desktop.
- Click Status & Settings.
- Click Personal Firewall.
- To enable, click the Turn On button.
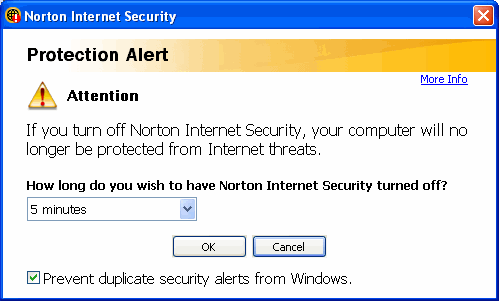
- To disable, click the Turn Off button.
 - Select a duration that you would like to have that particular component disabled.
 - Click OK.
To log in using a Supervisor account (Norton Internet Security only): - In the Windows system tray, click the Norton Internet Security icon.
- Select Log Off.
- Click Yes, to confirm.
- In the Windows system tray, click the Norton Internet Security icon.
- Click Account Login.
- In the Log On dialog box, select the supervisor account
- Enter the Password, (if required.)
- Click OK.
Return to Norton Personal Firewall Main Index page
| |