Common BlueLight Internet Companion Errors / Solutions "The toolbar does not display" This may be a problem on our network or a problem with your systems configuration. The following instructions should help you resolve the problem. A. Have you tried another access number? Before making any changes, try logging on to BlueLight Internet using a different access number. Contact your local phone company to ensure the number is local for you. To find available access numbers in your area, click here. WARNING: THE USE OF SOME TELEPHONE ACCESS NUMBERS MAY RESULT IN LONG DISTANCE CHARGES. IN SELECTING YOUR ACCESS NUMBER(S), PLEASE NOTE THAT ALTHOUGH AN ACCESS NUMBER MAY BE IN YOUR AREA CODE OR LOCATED IN YOUR GENERAL GEOGRAPHIC REGION, IT MAY NOT NECESSARILY BE A LOCAL NUMBER FOR YOU. YOU MAY INCUR SUBSTANTIAL TELEPHONE CHARGES IF YOU CHOOSE ACCESS NUMBERS THAT ARE NOT COVERED BY YOUR LOCAL CALLING PLAN. WE URGE YOU TO CHECK WITH YOUR TELEPHONE COMPANY TO FIND OUT WHICH NUMBERS ARE LOCAL FOR YOU BEFORE USING A NUMBER FROM THIS LIST. Note: You are solely responsible for all telephone charges related to accessing our services. BlueLight Internet will not reimburse you for any such charges, including long distance or toll charges.
B. Verify that you have all of the components necessary to get online - Click on the Windows Start button, point to Settings and select Control Panel. Double-click on the Network icon.
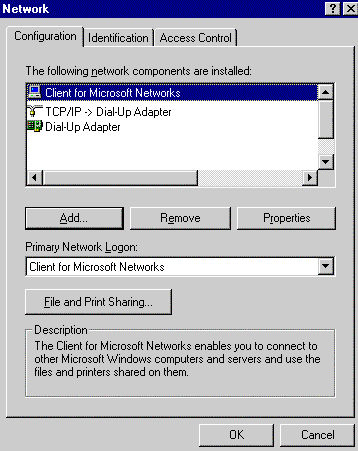 - Check to see if you have the following components:
- Client For Microsoft Networks
- TCP/IP or TCP/IP > Dial Up Adapter
- Dial-Up Adapter
If you are on a Network or company LAN, contact your system administrator before making any network changes. If the components listed above are not present, then you will need to add the missing component(s). If all of the components are listed, skip to step C - Verify Your Network Settings below. IMPORTANT! Only add a component if it is not already present. If the component is listed, you will not need to add it. To Add Client for Microsoft Networks: 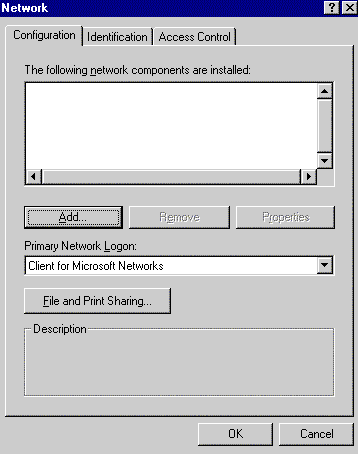 - Click on the Add button.
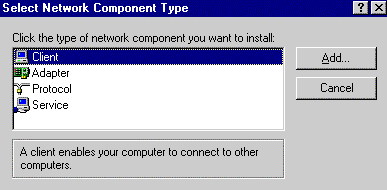 - Select Client.
- Click on the Add button.
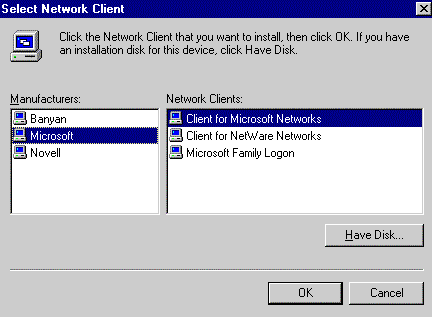 - Under Manufacturers, select Microsoft.
- Under Network Clients, select Client for Microsoft Networks.
- Click OK.
To Add Dial-up Adapter: - Click on the Add button.
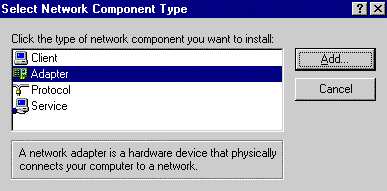 - Select Adapter.
- Click on the Add button.
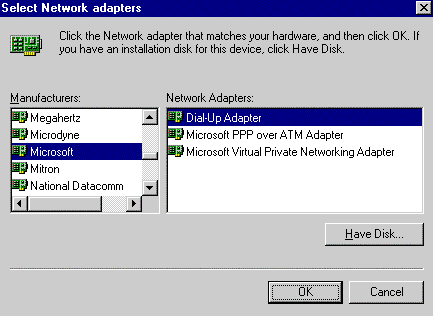 - Under Manufacturers, select Microsoft.
- Under Network Adapters, choose Dial-Up Adapter.
- Click OK.
To Add TCP/IP: - Click on the Add button.
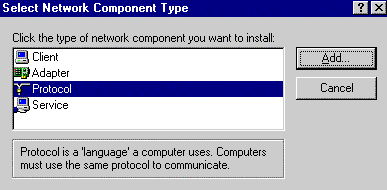 - Select Protocol.
- Click on the Add button.
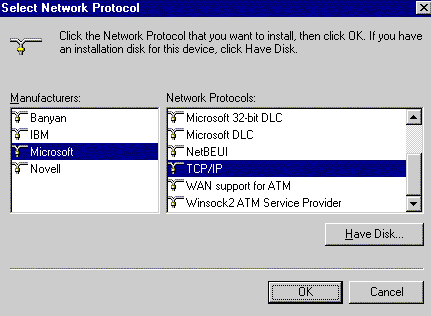 - Under Manufacturers, select Microsoft.
- Under Network Protocols, select TCP/IP.
- Click OK.
C. Verify Your Network Settings Once you've added any necessary components, follow the steps below. - Click once on TCP/IP to highlight it and click on the Properties button.
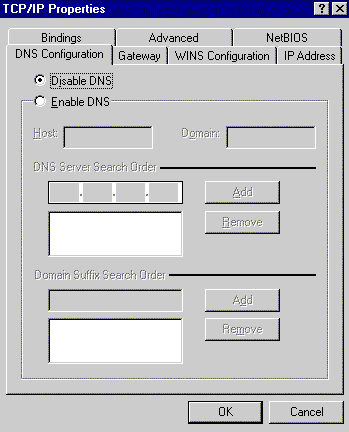 - Select the DNS Configuration tab and ensure that Disable DNS is checked.
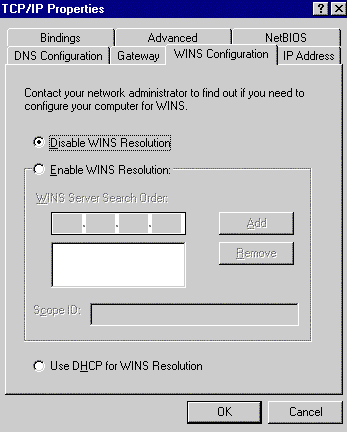 - Select the WINS Configuration tab and make sure that Disable WINS Resolution is checked.
- Click OK.
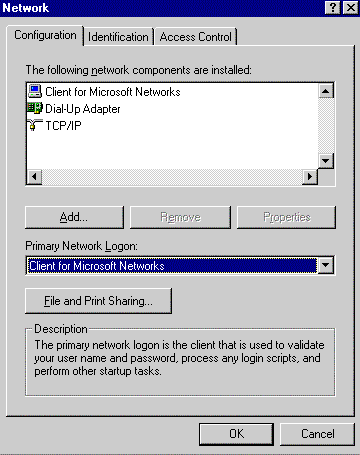 - In the Primary Network Logon field, make sure that Client for Microsoft Networks is selected.
- Click OK.
- Close the Control Panel.
D. Are you running Windows 95? If you are running Windows 95, check to see what version you have. If you have an older version, you may need to download the latest version of Dial-Up Networking (version 1.3). To check what version of Windows 95 you are running, please follow the steps below. - Click on the Windows Start button, point to Settings and select Control Panel.
- Double-click on the System icon and select the General tab.
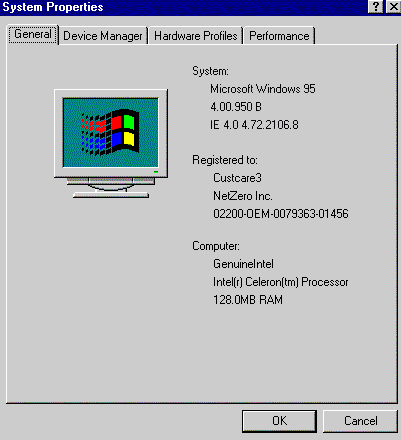 - Under System, you will see listed the Operating System, Edition and version number. The version number will start with 4.00.950. Check to see if you see a B or C after 4.00.950. If not you will need to download and install Dial-Up Networking 1.3. Click here to download it.
- Also for Windows 95, if there is no letter at all after 4.00.950, then we suggest you also download and install Service Pack 1 for Windows 95. You can download load it by clicking here
- Try your BlueLight Internet connection again.
Once you have successfully installed the latest version of Dial-Up Networking, follow these steps to uninstall BlueLight Internet and make sure that your network configurations are correct before you reinstall the BlueLight Internet software. Before starting this process, make sure that you have your Windows CD, as well as the BLQSSetup.exe file on your system or the BlueLight Internet CD. Click here to download the latest version of our software. Once you have the BlueLight Internet software, please follow these steps to completely uninstall and reinstall BlueLight Internet: - Click on the Windows Start button, point to Settings and select Control Panel.
- Double-click on the Add/Remove Programs icon.
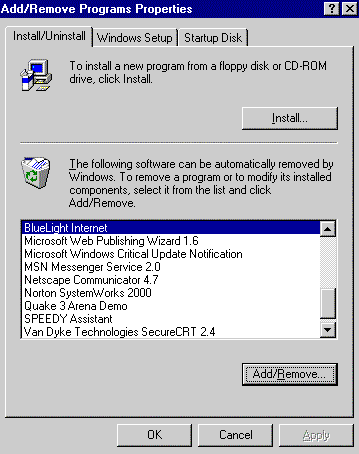 - Click once on BlueLight Internet to highlight it and click on the Add/Remove button.
- Click OK then OK again and close the Control Panel.
- Click on the Windows Start button, point to Programs and select Windows Explorer.
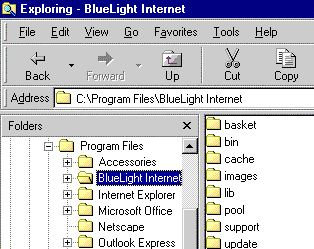 - Double-click the Program Files folder in the left-side window.
- Click once on the BlueLight Internet folder to highlight it and press the Delete key on your keyboard to remove it.
- Close Windows Explorer.
- Double-click on the My Computer icon on your desktop.
- Double-click on the Dial-Up Networking icon.
- Click once on the BlueLight Internet icon to highlight it and press the Delete key on your keyboard to remove it.
- Restart the computer, and then reinstall the latest version of BlueLight Internet.
To locate the BLQSSetup.exe file using Windows 95/98, please follow the steps below. - Click the Windows Start button, point to Find and select Files or Folders.
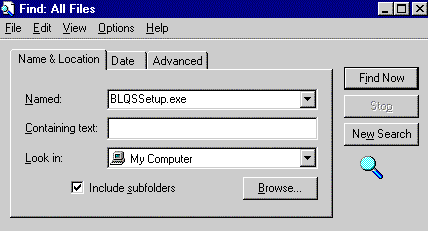 - In the Named field, type BLQSSetup.exe
- Ensure that the Look in field indicates My Computer.
- Click on the Find now button.
- When the BLQSSetup.exe file is found, double-click on it to run the installation program.
- When the installation is complete, retry your BlueLight Internet connection.
Try your BlueLight Internet connection again. If the problem persists, please ensure that your modem is configured correctly by following the steps below.
E. Is your modem configured correctly? - Click on the Windows Start button, point to Settings and select Control Panel.
- Double-click the Modems icon.
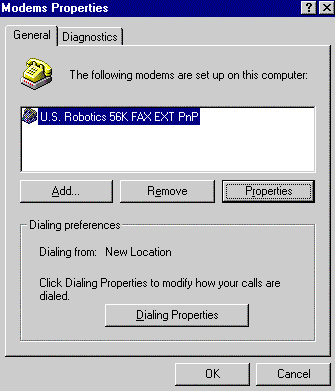 - Click once on the modem that is installed to highlight it and click on the Properties button.
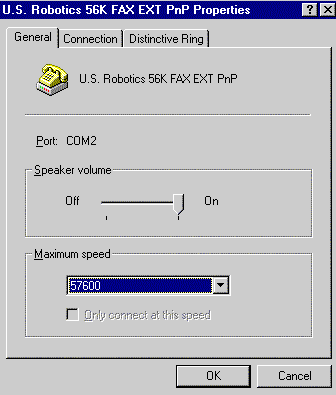 - Select the General tab and look for the Maximum Speed section. Change the settings to match your modem.
A. If you have a 28.8 or 33.6 modem, select 38400.
B. If you have a 56k or Flex modem, select 57600. - Verify that the box for Only connect at this speed is NOT checked.
- Click OK, then OK again and close the Control Panel.
- Double-click on the My Computer icon on your desktop.
- Double-click on the Dial-Up Networking icon.
- Click once on the BlueLight Internet icon to highlight it. From the File menu, select Properties.
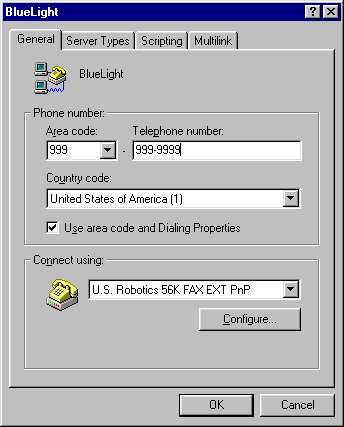 - Ensure the correct modem is selected in the Connect using field.
- Click on the Configure button.
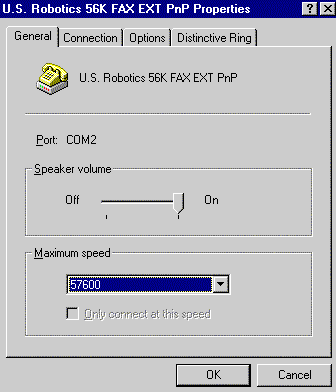 - Select the General tab and look for the Maximum Speed section. Change the settings to match your modem.
A. If you have a 28.8 or 33.6 modem, select 38400.
B. If you have a 56k or Flex modem, select 57600. - Verify that the box for Only connect at this speed is NOT checked.
- Click OK, then OK again and close Dial-Up Networking.
- Close all windows.
Try your BlueLight Internet connection again.
Note: You can only connect to BlueLight Internet by double-clicking on the BlueLight Internet icon on your desktop. You will not be able to connect to BlueLight Internet using Dial Up Networking directly.
| |
