Common Connection Errors / Solutions Error 718: PPP timeout
Error 720: No PPP control protocols configured
Error 721: Remote PPP peer is not responding If this does not resolve the issue, please follow the steps below:
A. Have you tried another access number? Your connection may have been dropped due to technical difficulties with the access number you are using. Try connecting to BlueLight Internet again. If the problem persists, try using another access number in your area. For instructions on how to change your access number please click here. 
B. Verify your encryption settings If the problem persists, follow the steps below to verify your network settings. - Double-click the My Computer icon on your desktop.
- Double-click the Dial-Up Networking icon.
- Click once on the BlueLight Internet icon to highlight it.
- From the File menu, select Properties.
- Select the Server Types tab.
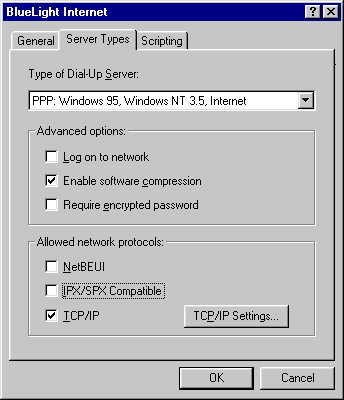 - Ensure that the option labeled Require encrypted password is NOT checked.
- Click OK.
- Click OK again.
- Retry the BlueLight Internet connection.

C. Verify Network Settings - Click the Windows Start button, point to Settings and select Control Panel.
- Double-click the Network icon.
- Check to see if you have the following components:
Client For Microsoft Networks
TCP/IP or TCP/IP > Dial Up Adapter
Dial-Up Adapter.
Note: If you are on a Network or company LAN, contact your system administrator before making any network changes. If the components listed above are not present, then add the missing component(s). IMPORTANT! Only add a component if it is not already present. If the component is listed, you will not need to add it. To Add Client for Microsoft Networks: 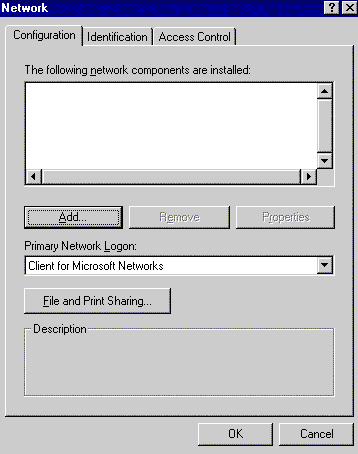 - Click Add.
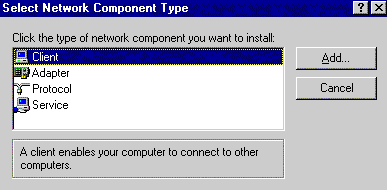 - Select Client.
- Click Add.
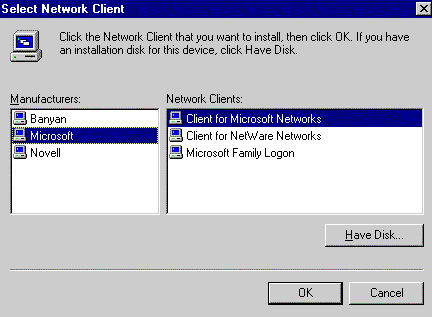 - Under Manufacturers, select Microsoft.
- Under Network Clients, select Client for Microsoft Networks.
- Click OK.
To Add Dial-up Adapter: - Click Add.
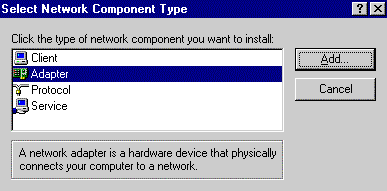 - Select Adapter.
- Click Add.
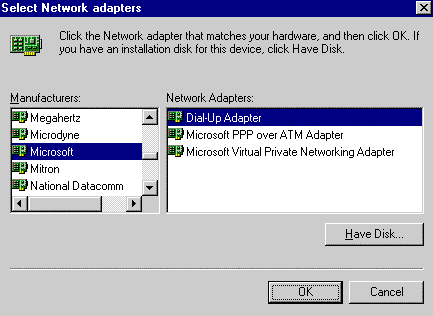 - Under Manufacturers, select Microsoft.
- Under Network Adapters, select Dial-Up Adapter.
- Click OK.
To Add TCP/IP: - Click Add.
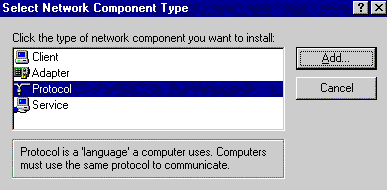 - Select Protocol.
- Click Add.
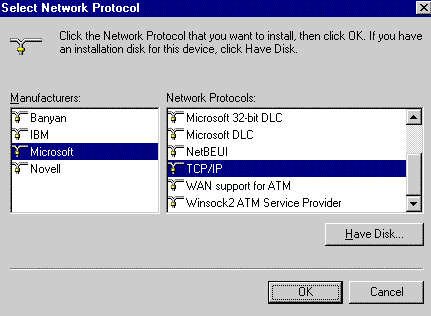 - Under Manufacturers, select Microsoft.
- Under Network Protocols, select TCP/IP.
- Click OK.
Once you've added any necessary components, follow the steps below. - Click on TCP/IP to highlight it and click Properties.
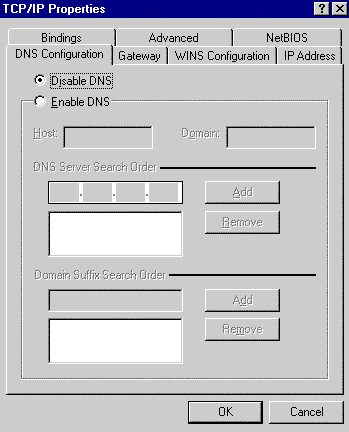 - Select the DNS Configuration tab and ensure that Disable DNS is checked.
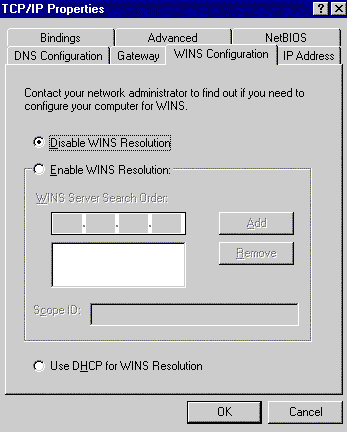 - Select the WINS Configuration tab and make sure that Disable WINS Resolution is checked.
- Click OK.
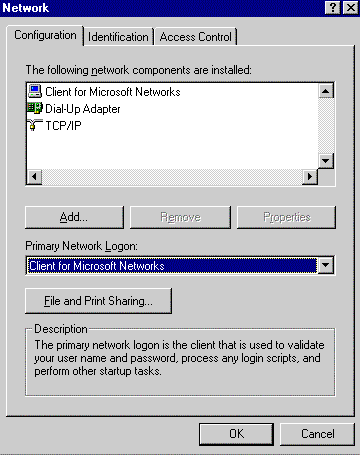 - In the Primary Network Logon field, ensure that Client for Microsoft Networks is selected.
- Click OK.
- Click on Dial-up Adapter once to highlight it.
- Click Properties.
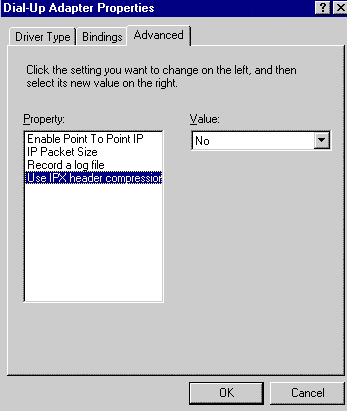 - Select the Advanced tab and click on Use IPX Header Compression to highlight it.
- Under the Value drop-down menu, select NO.
- Click OK and OK again.
- When you are prompted to restart you computer, click YES.
Windows 98 Users:Check to see that Dial-Up Networking is installed on your computer by following these steps: - On your desktop, double-click the My Computer icon .
- If you see a Dial-Up Networking icon, Dial-Up Networking is installed. Close My Computer and try logging on to BlueLight Internet again by double-clicking the BlueLight Internet icon on your Desktop.
- If you do not see a Dial-Up Networking icon, close My Computer, then click the Windows Start button, point to Settings and select Control Panel.
- Double-click the Add/Remove Programs icon.
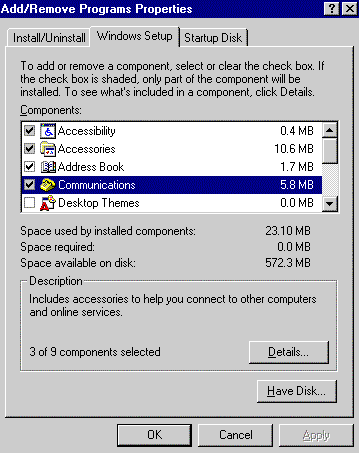 - Select the Windows Setup tab, and double-click on Communications.
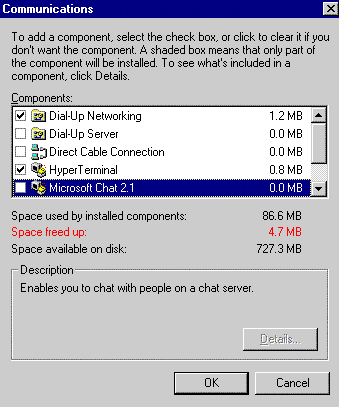 - Put a check in the box next to Dial-Up Networking, Hyperterminal and Phone Dialer.
- Click OK and click OK again to exit.
- Close the Control Panel and try logging on to BlueLight Internet again.

| |
